 Zudo Works
How to add a button to a report that sets fields
One click changes a field on many records at once — for example tick the items that may be moved and set their Allow Movements box to Yes. Works on table reports of custom forms and of Items, Customers, Vendors, Warehouses, Work centers, Jobs, Sales orders and Purchase orders.
- If the field does not exist yet, add it first (see "How to add a custom field to a built-in form" — here a Checkbox "Allow Movements" on Items). Then, in the sidebar, open Settings and under Forms & automation press Reports.
- Press New report, choose Items under From a section, then Table.
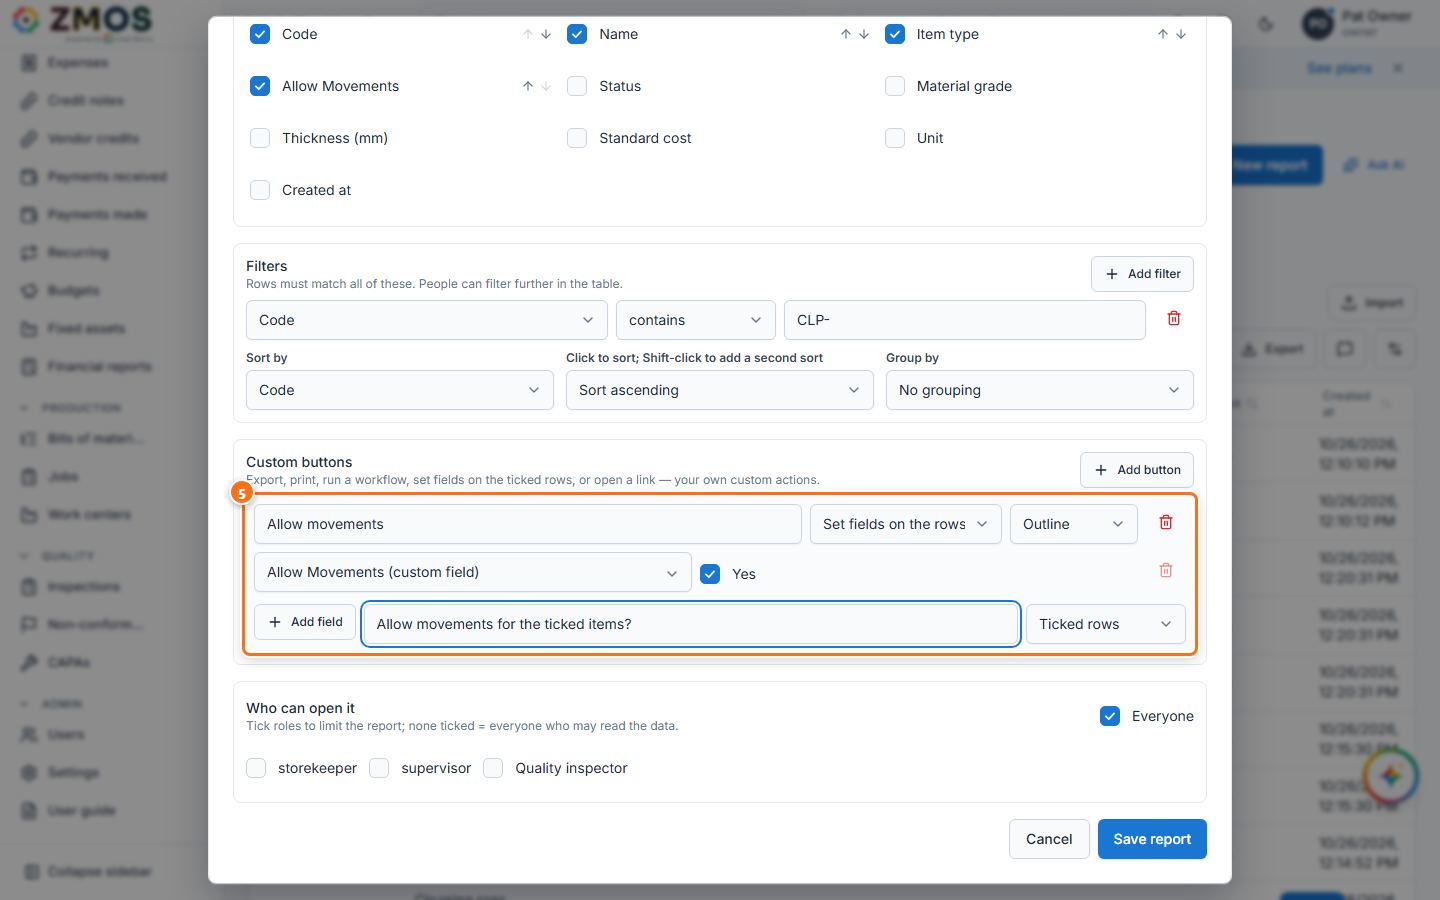
- Type the Name (for example "Spring clips"), tick the Columns you want (Code, Name, Item type, Allow Movements) and, if you like, press Add filter (Code contains
CLP-) and choose Sort by. - Under Custom buttons, press Add button.
- In the new button row: type the button's label in the first box ("Allow movements") and set the action list to Set fields on the rows. On the next line choose the field — Allow Movements (custom field) — and its value (ticked = Yes; a dropdown field offers its options, an empty value clears the field). Add field sets more fields with the same press. Type a question in Ask before (optional) ("Allow movements for the ticked items?") and leave Ticked rows (or choose All rows shown).
- Press Save report. "Report saved" — the report opens with your button above the table.
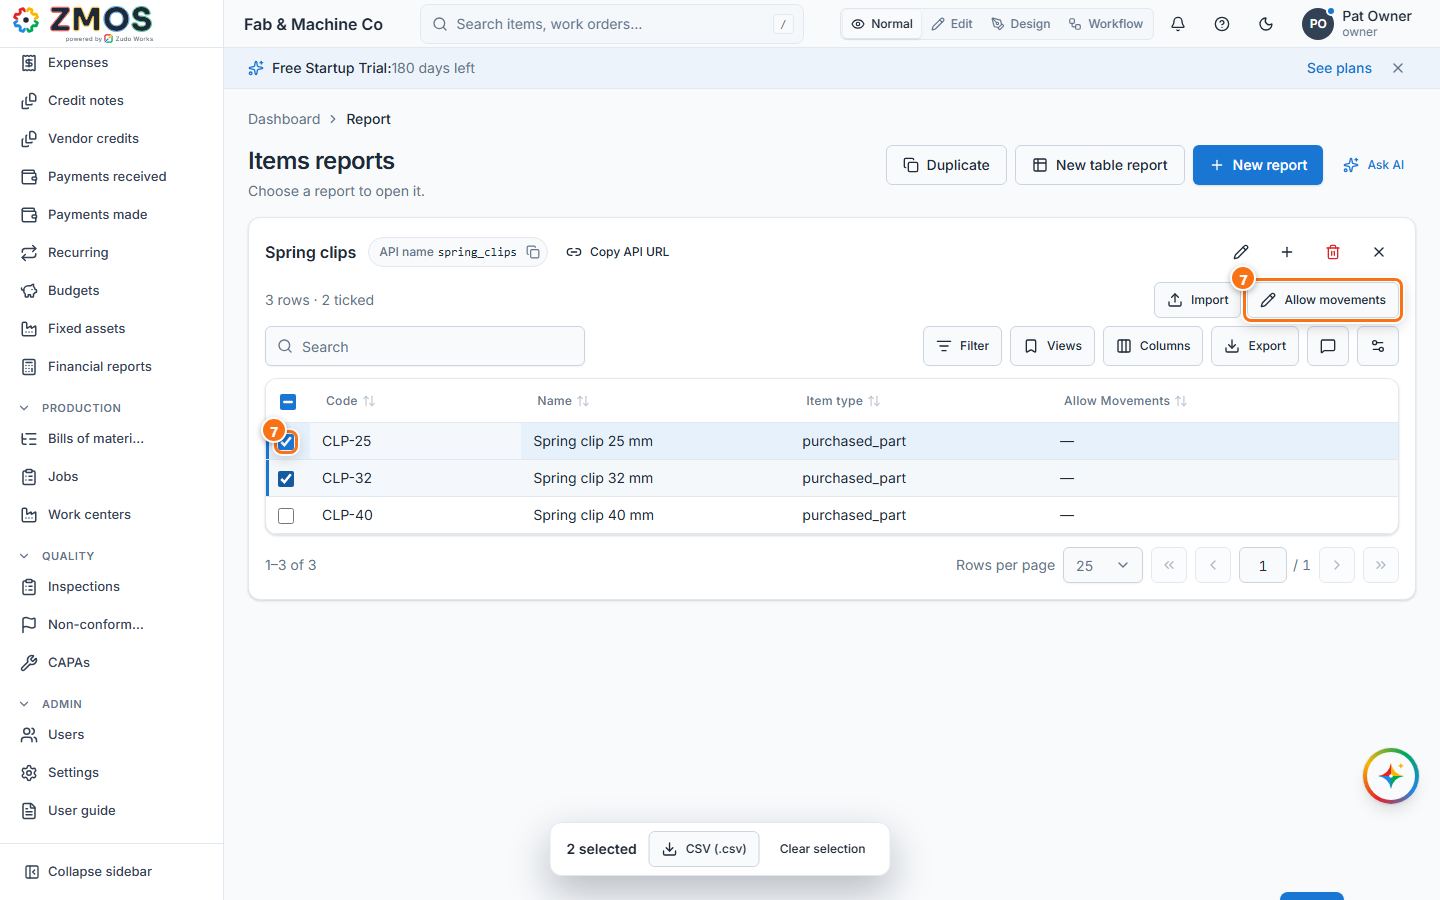
- Tick the rows to change and press the button (Allow movements).
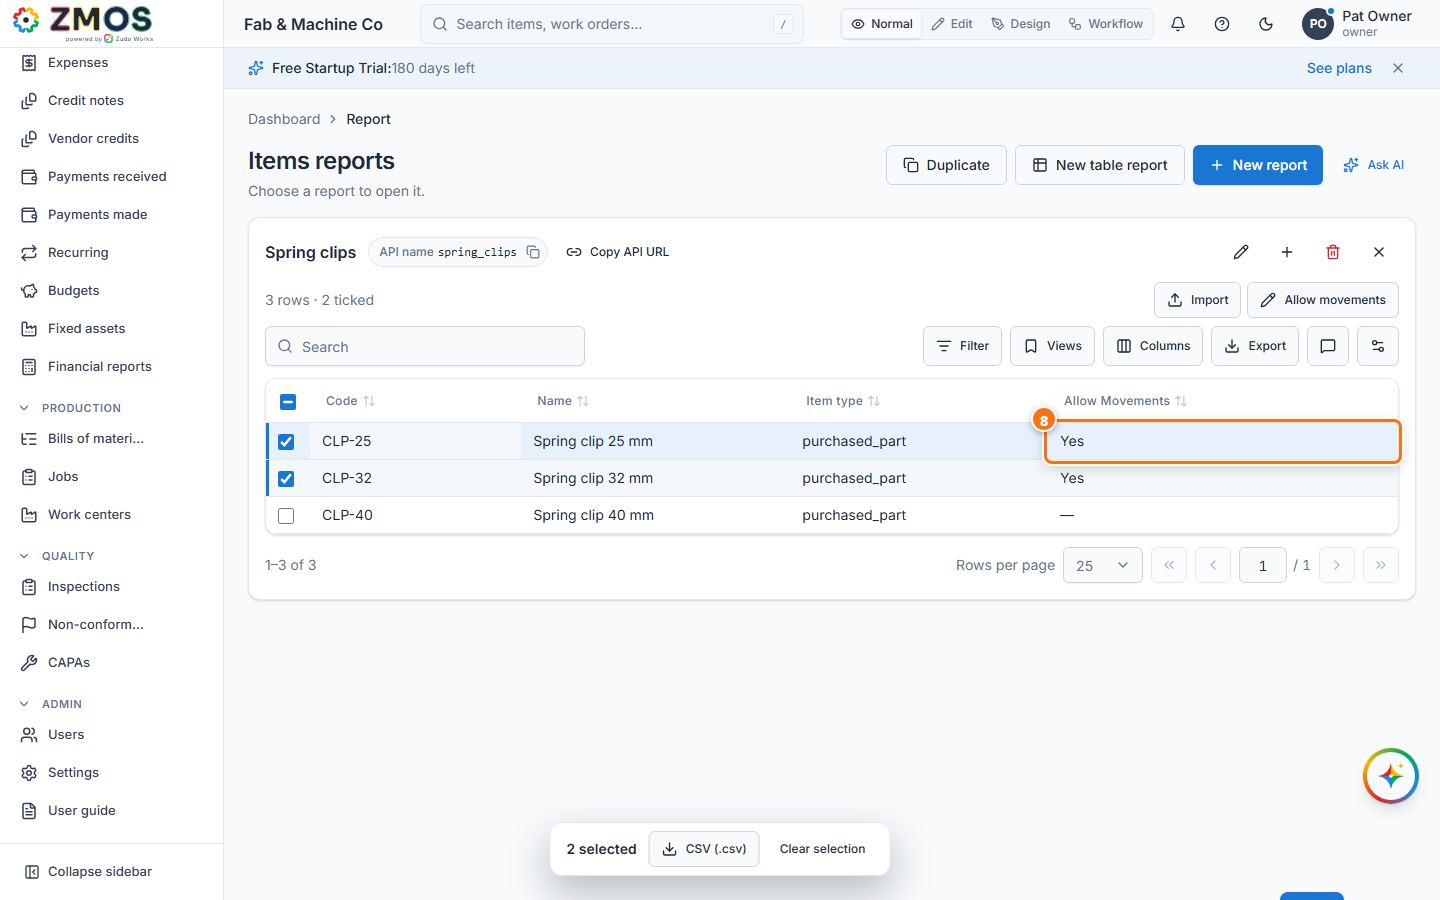
- Confirm in the dialog that asks your question (its confirm button carries the button's label). "2 rows changed" appears and the ticked rows show Yes.
Tip: a button changes each row exactly like editing it — it needs the section's edit permission and the same checks apply (a confirmed order or a completed job is reported and left as it is). Codes, numbers and order lines are never changed by a button.
Last updated