 Zudo Works
How to arrange a form by drag and drop
Put the fields of an entry form where your people expect them — wider boxes for long values, headings between groups, an extra field — for everyone in the workspace. Works on Items, Customers, Vendors, Warehouses, Work centers, Jobs, the header of sales and purchase orders and every custom form.
- Open the form — for example, in the sidebar under Masters, click Items. The New item form opens.
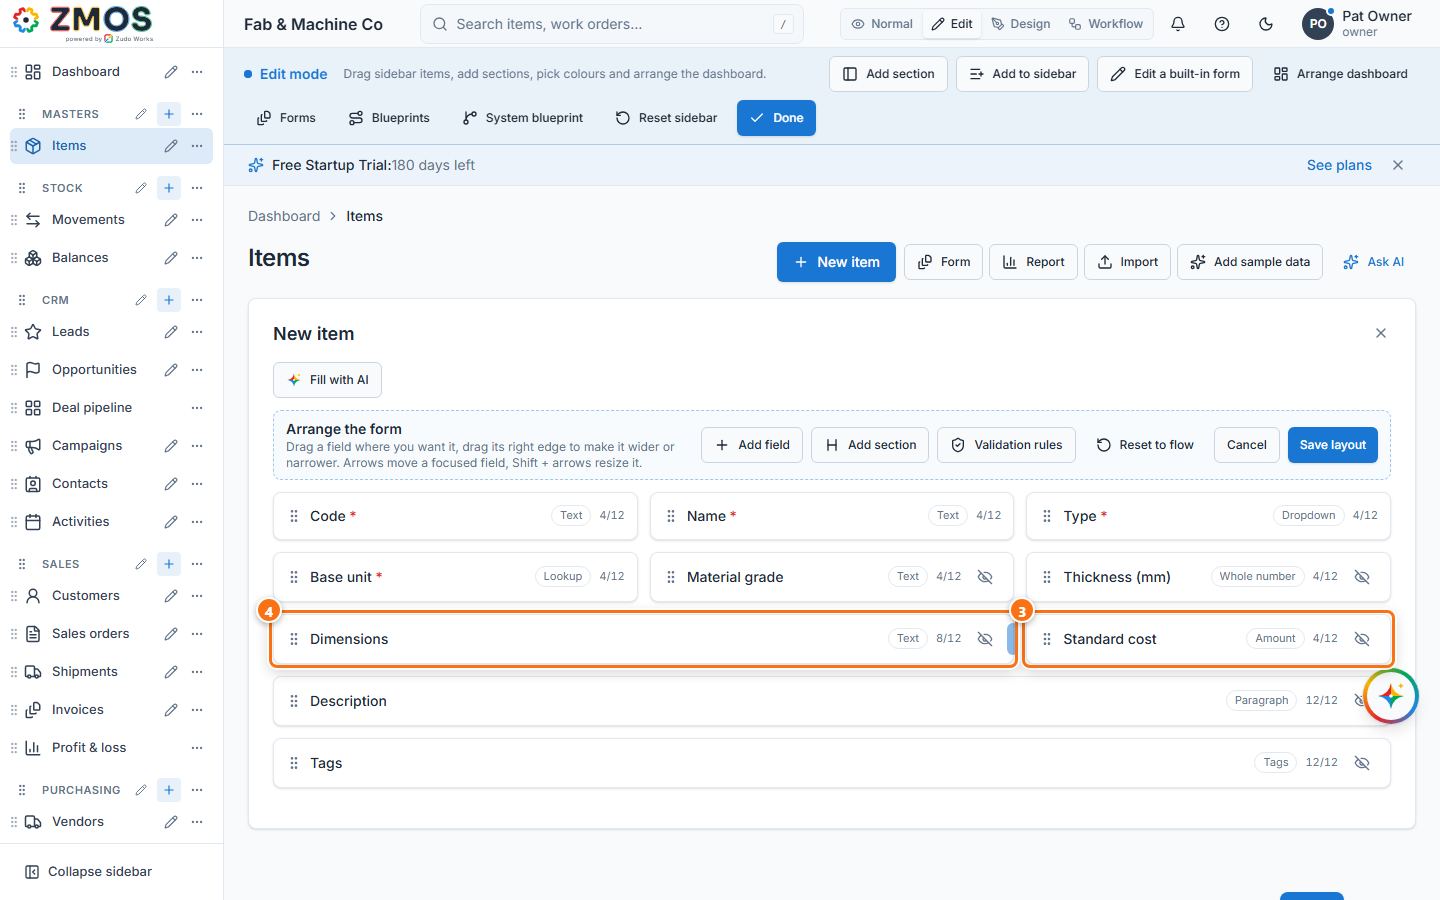
- In the top bar, switch the view mode to Edit. The form turns into its designer: under Arrange the form every field is a card showing its type and width (4/12 = a third of the row). The form's own Save and Cancel step aside while you design.
- Drag a card by its body to where you want it — for example Standard cost to the free place at the end of its row. Cards in the way move down to make room.
- To make a field wider or narrower, point at its card and drag the small handle on its right edge — for example Dimensions from 4/12 to 8/12. With the keyboard: click a card, the arrow keys move it, Shift + ← / → change its width.
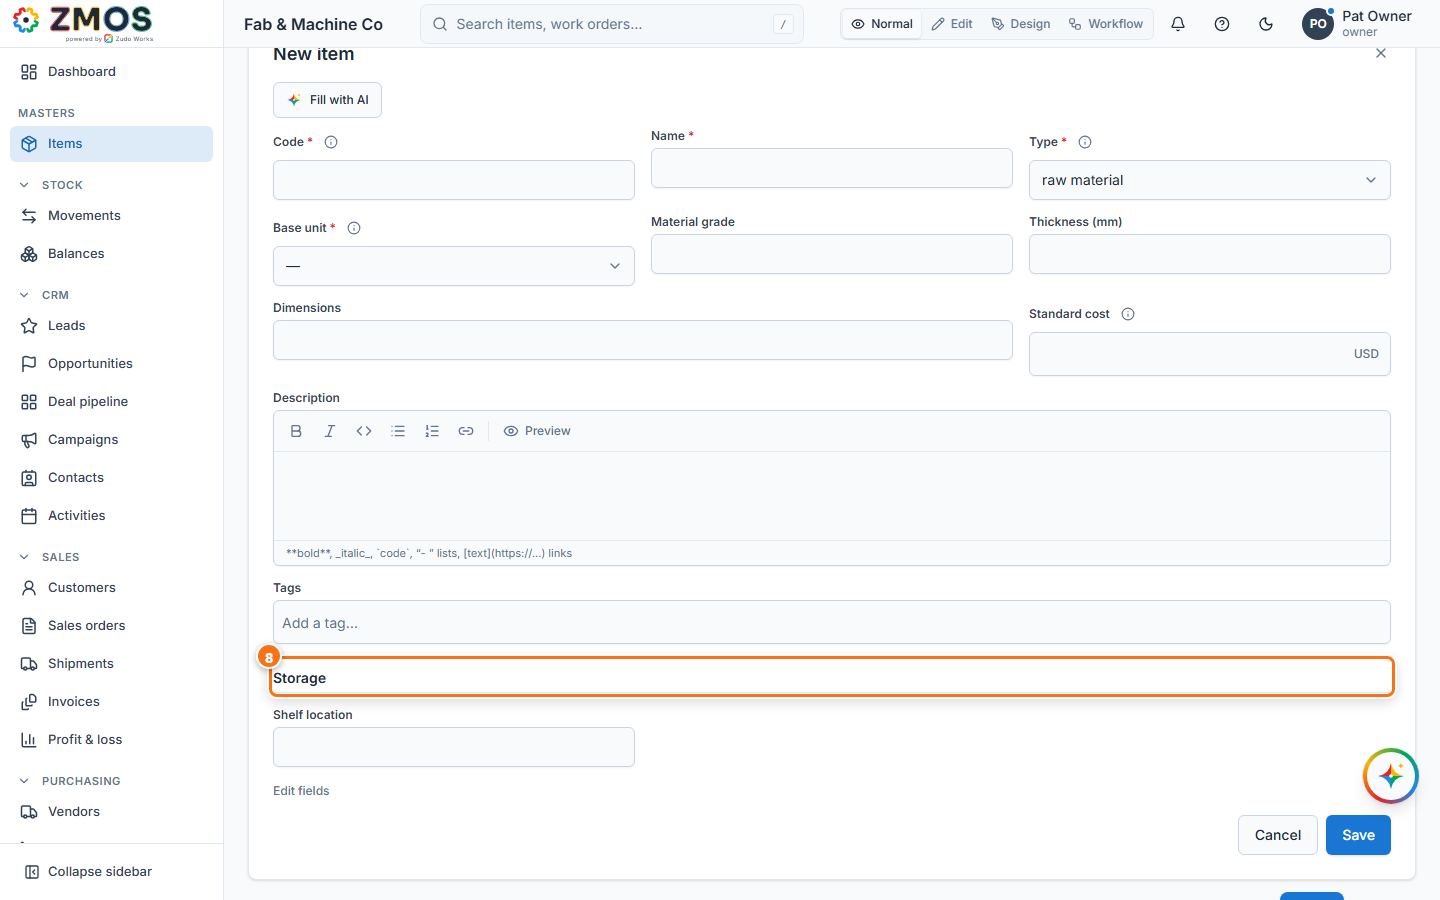
- Press Add section in the Arrange the form bar. A Section card titled "New section" appears below the fields: click the title and type your heading (for example "Storage"). Drag the card between the fields to place the heading; × removes it. (The Add section button in the Edit mode bar at the very top is a different one — it adds a section to the sidebar.)
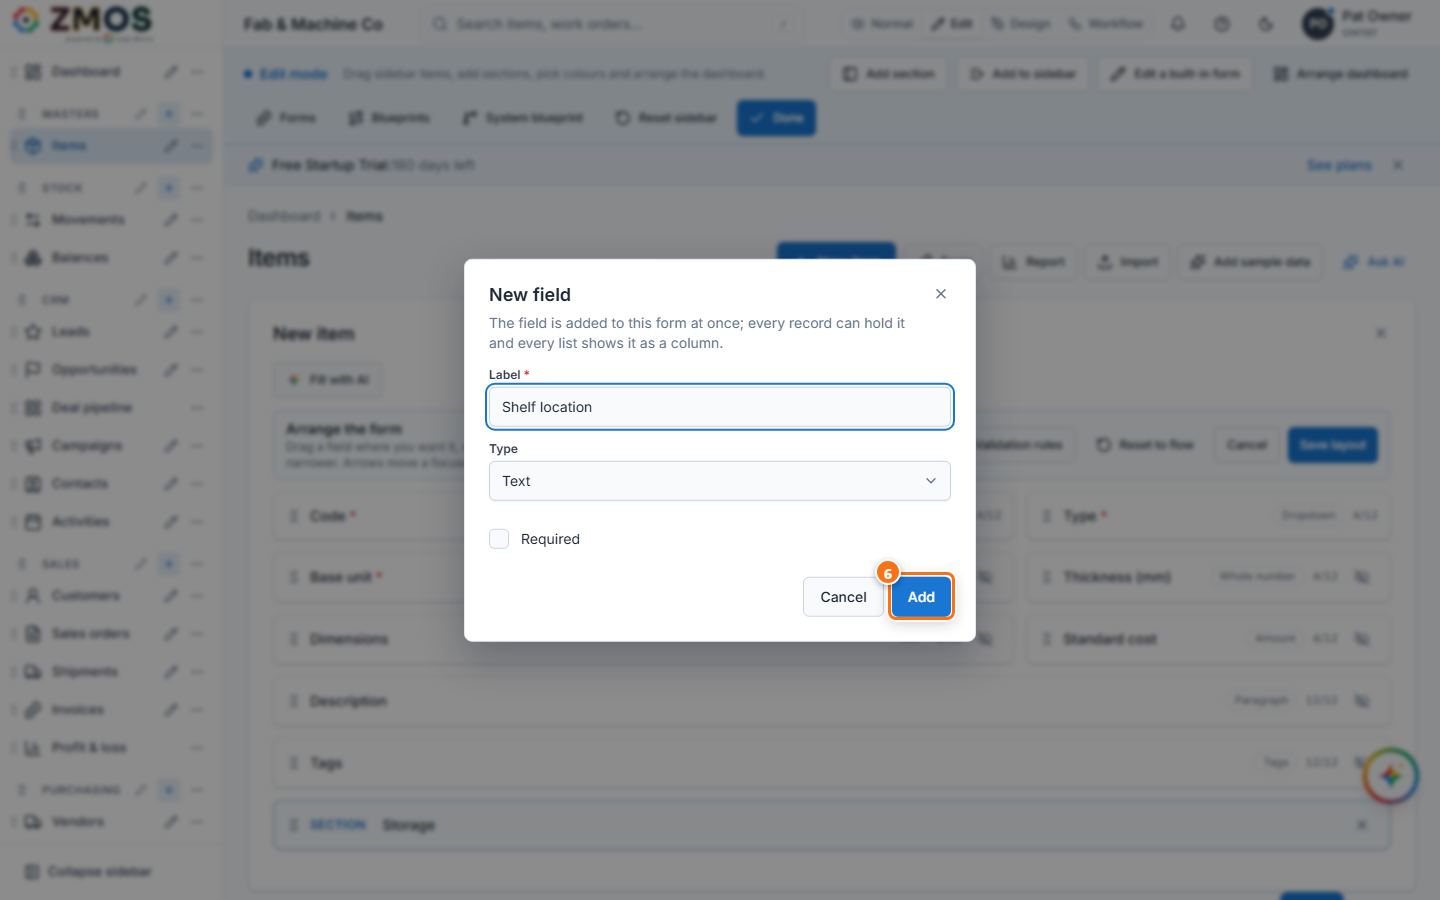
- Press Add field. In New field, type the Label (for example "Shelf location"), choose the Type (Text, Paragraph, Whole number, Date, Checkbox, Dropdown with its Options one per line …), tick Required if it must be filled in, and press Add. "Field added": the field is saved at once as a custom field of the section — on every record, as a column of the list and in reports — and its card lands in the first free place.
- Press Save layout. "Form layout saved" — the arrangement now applies for everyone. (Reset to flow goes back to the default order; Cancel drops the unsaved changes and leaves Edit mode.)
- Switch back to Normal: the form follows your arrangement, with the heading and the new field.
Tip: the eye on an optional built-in field hides it (it waits in the Hidden fields tray below the cards — click it to bring it back); the bin on a custom field deletes the field and its values for good, after a confirmation. Arranging a built-in form needs the settings.manage permission, adding or removing fields forms.design.
Last updated