 Zudo Works
How to create your account and finish the setup wizard
Create a new workspace for your company (free trial, no card) and answer the 4-step setup wizard.
- On the sign-in page press Create account (or open
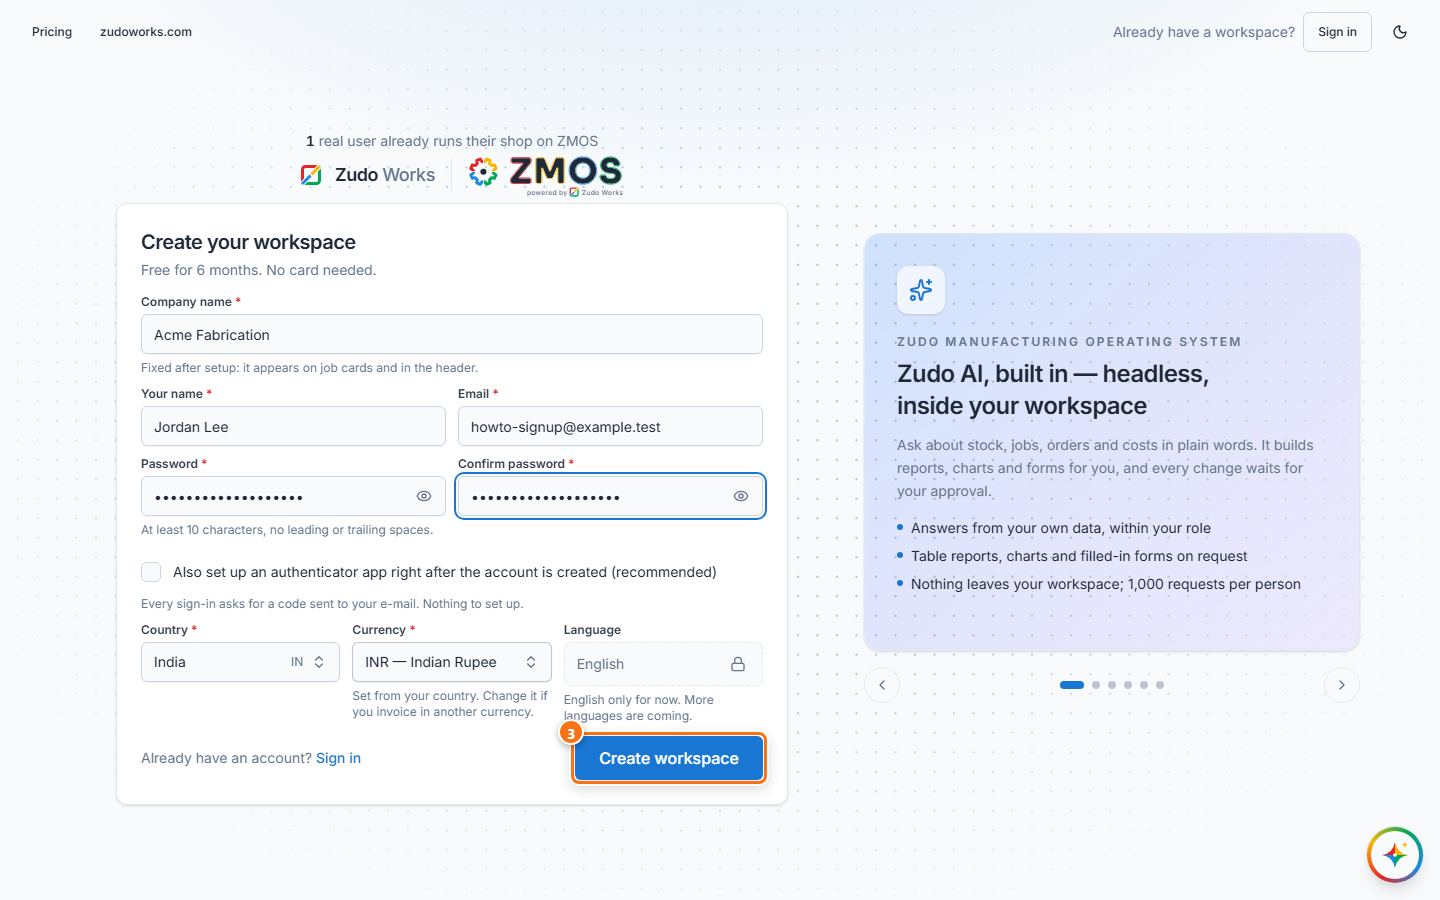
/signup). The Create your workspace form opens. - Fill in Company name, Your name, Email, Password and Confirm password (at least 10 characters). Check Country and Currency (the currency follows the country; change it if you invoice in another one). Tick Also set up an authenticator app right after the account is created (recommended) if you want that now.
- Press Create workspace.
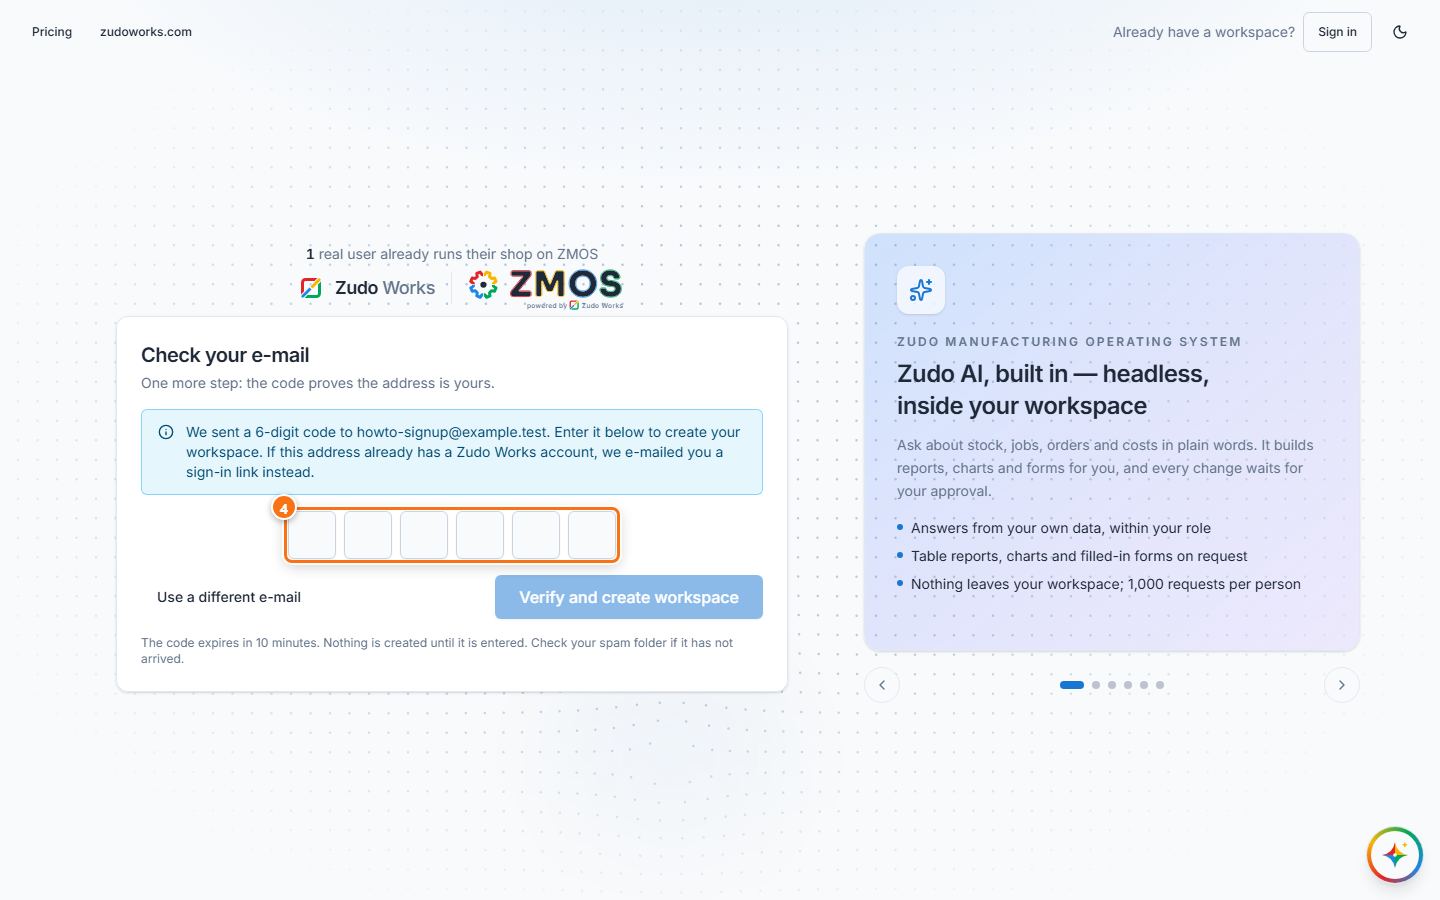
- Check your e-mail: type the 6-digit code we sent (subject “123456 is your Zudo Works verification code”) into the boxes. The workspace is created as soon as the code is right (or press Verify and create workspace). Wrong address? Press Use a different e-mail.
- The setup wizard Set up your workspace opens (
/welcome). Step 1 of 4 — Company details: the Legal name is fixed; set the Display name (shown in menus and to your team), the Time zone and optionally upload your logo. Press Continue. - Step 2 — Your industry (optional): press the industry closest to yours, for example Sheet metal, then Continue (or Skip this step).
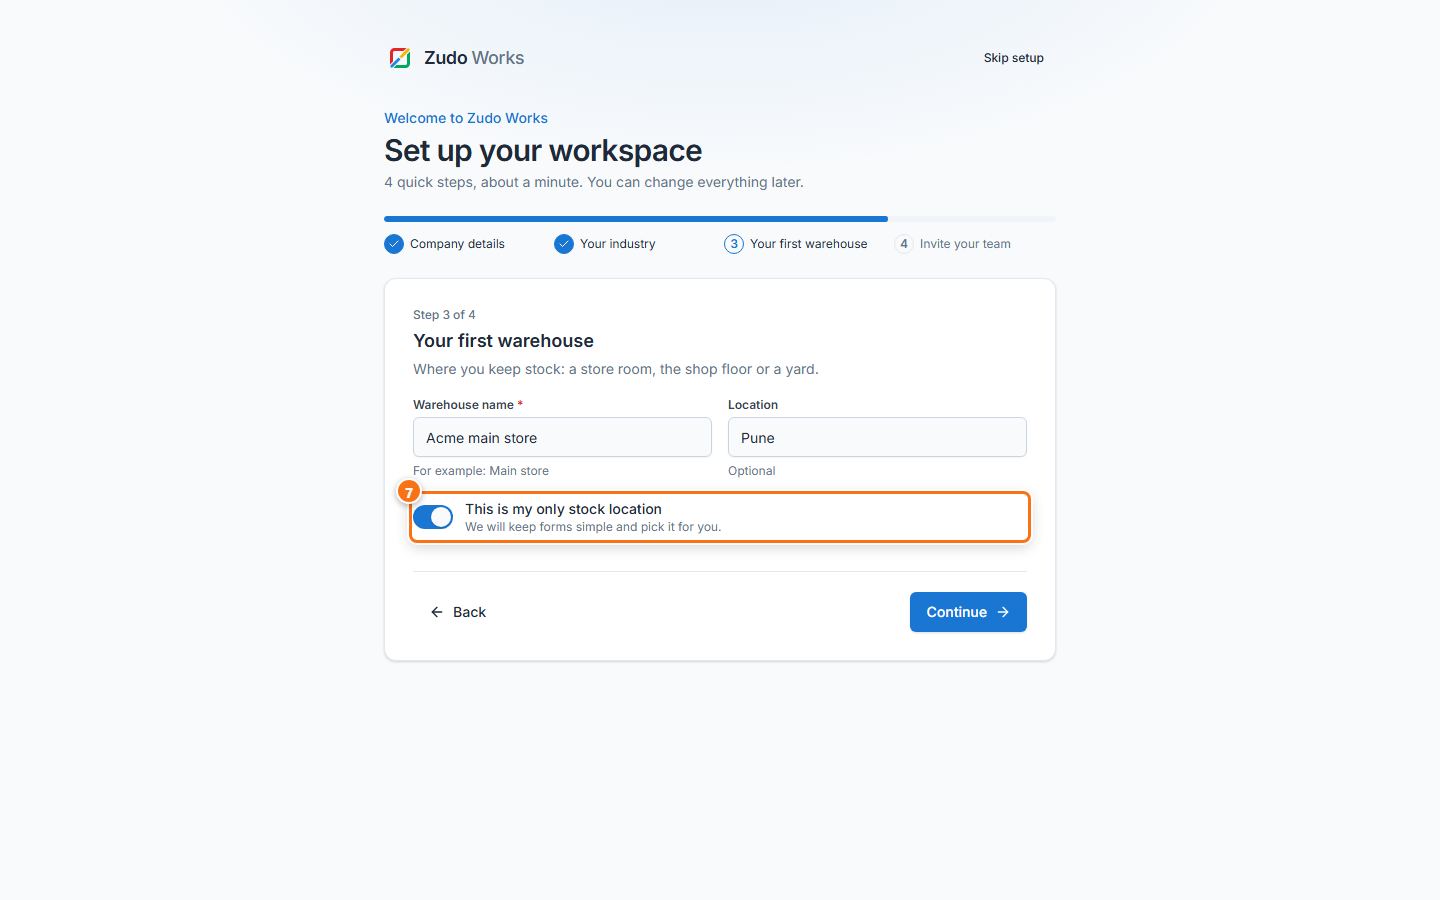
- Step 3 — Your first warehouse: type the Warehouse name and, if you like, the Location. If you keep all stock in one place, turn on This is my only stock location — forms then stay simple and pick that warehouse for you. Press Continue.
- Step 4 — Invite your team (optional): type a teammate’s Email, choose a Role and press Send invitation (they get an e-mail link, valid for 7 days, where they choose their own name and password; you can resend or revoke it under Users), or press Skip this step. Press Finish setup.
- The Dashboard opens with “Your workspace is ready” and a Get-started checklist.
Tip: Skip setup (top right) leaves the wizard at any time; everything it asks can be changed later under Settings.
Last updated